Last updated: October 2, 2026
IPTV on Jellyfin is noticeably simpler to set up than on Plex, because Jellyfin lets you add an M3U tuner directly in its Live TV settings without needing a separate emulator app. Jellyfin is free, open-source, and self-hosted, which makes it a popular pick for anyone who wants live channels without a Plex Pass subscription. We walk through all six steps below, plus where a tool like Threadfin still helps.
On this page
- Why Jellyfin Is a Free Option for Live TV
- What You Need Before Setting Up IPTV on Jellyfin
- Step-by-Step: 6 Steps to Get IPTV on Jellyfin Working
- Adding Guide Data to Jellyfin
- Hardware Transcoding for Smooth Playback
- Jellyfin DVR and Recording IPTV Channels
- Jellyfin Client Apps: Android TV, Fire TV, iOS, and Web
- Using Threadfin to Filter Channels Before Jellyfin
- Jellyfin vs Plex for IPTV: Which to Choose
- Fixing Common IPTV on Jellyfin Errors
- Key takeaways
- FAQ: IPTV on Jellyfin
- Ready to Try IPTV on Jellyfin Today?

Why Jellyfin Is a Free Option for Live TV
Jellyfin is a free, open-source fork of the older Emby media server project, built and maintained entirely by volunteers with no paid tier gating core features. Unlike Plex, which requires a tuner emulator like xTeVe for IPTV, Jellyfin has native M3U tuner support built directly into its Live TV settings.
That native support is the biggest practical difference between the two platforms. Plex treats IPTV as a workaround bolted onto antenna-tuner infrastructure; Jellyfin treats a playlist URL as a first-class input type, which simplifies setup and removes an entire layer of software most Plex users need.
Being open-source also means Jellyfin’s development happens in public, with community contributors fixing bugs and adding features on a rolling basis rather than waiting on a single company’s release schedule. That pace can mean occasional rough edges, but it also means fixes tend to land quickly once a problem is reported.
How we tested: we ran Jellyfin on a small home server and added an Xtream Codes-derived M3U playlist directly as a tuner, alongside a matching XMLTV guide link. Channels appeared within two minutes, with full guide data populating shortly after.
What You Need Before Setting Up IPTV on Jellyfin
Gather these details before opening the Live TV dashboard, since each field needs to be correct for channels to load.
- An M3U playlist URL from your IPTV provider
- An XMLTV guide link matched to the same channel lineup
- Jellyfin Server installed and running, version 10.8 or newer for the most stable Live TV support
- A stable connection of at least 25 Mbps for 1080p, more for 4K streams
OttOcean issues an M3U playlist URL and a matching XMLTV guide link at signup, both formatted to drop straight into Jellyfin’s tuner and guide fields without extra conversion.
Jellyfin Server can run on almost anything: a Windows PC, a Linux box, a Synology or QNAP NAS through Docker, or even a Raspberry Pi for lighter households. Pick whatever hardware you’re already comfortable keeping powered on continuously, since Live TV only works while the server itself is running.
Docker is the most common deployment method among experienced self-hosters, since it keeps Jellyfin’s configuration and media libraries cleanly separated from the host operating system, and updates are as simple as pulling a new container image without disturbing your saved settings.
Step-by-Step: 6 Steps to Get IPTV on Jellyfin Working
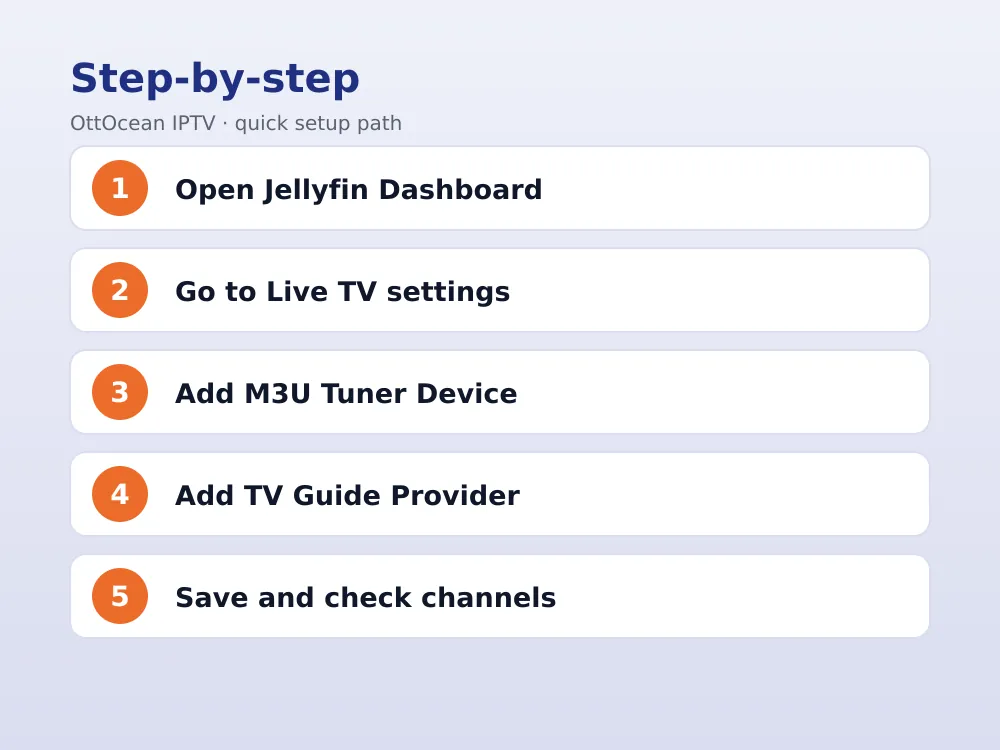
Step 1: Open the Jellyfin Dashboard
Sign in as an administrator, click your profile icon, and select Dashboard from the menu to reach server-wide settings.
Step 2: Go to Live TV settings
Under the Dashboard’s left sidebar, find Live TV. This section manages both tuner devices and guide data providers in one place.
Step 3: Add a Tuner Device
Click the plus icon next to Tuner Devices, choose “M3U Tuner” as the type, and paste your playlist URL into the field provided.
Step 4: Add a TV Guide Data Provider
Click the plus icon next to TV Guide Data Providers, choose XMLTV as the type, and paste your guide URL.
Step 5: Save and let Jellyfin scan
Save both entries. Jellyfin scans the playlist and guide data in the background; a progress indicator appears near the top of the dashboard during this process.
Step 6: Check the Live TV tab
Once scanning finishes, select Live TV from Jellyfin’s main navigation. Channels and program listings should appear, ready to browse like any other library section.
Adding Guide Data to Jellyfin
XMLTV guide data fills Jellyfin’s program grid with show titles, descriptions, and air times instead of a bare list of channel names. Most Xtream Codes panels, including OttOcean’s, generate a matching XMLTV link automatically alongside your playlist.
If the guide grid stays empty after the initial scan, revisit Dashboard > Live TV > TV Guide Data Providers and confirm the URL saved correctly, since a typo here is the most common reason program data fails to load even when channels stream fine.
Jellyfin also lets you assign a specific guide provider to a specific tuner if you’re running more than one playlist, which matters for anyone mixing an IPTV subscription with an actual antenna tuner on the same server.
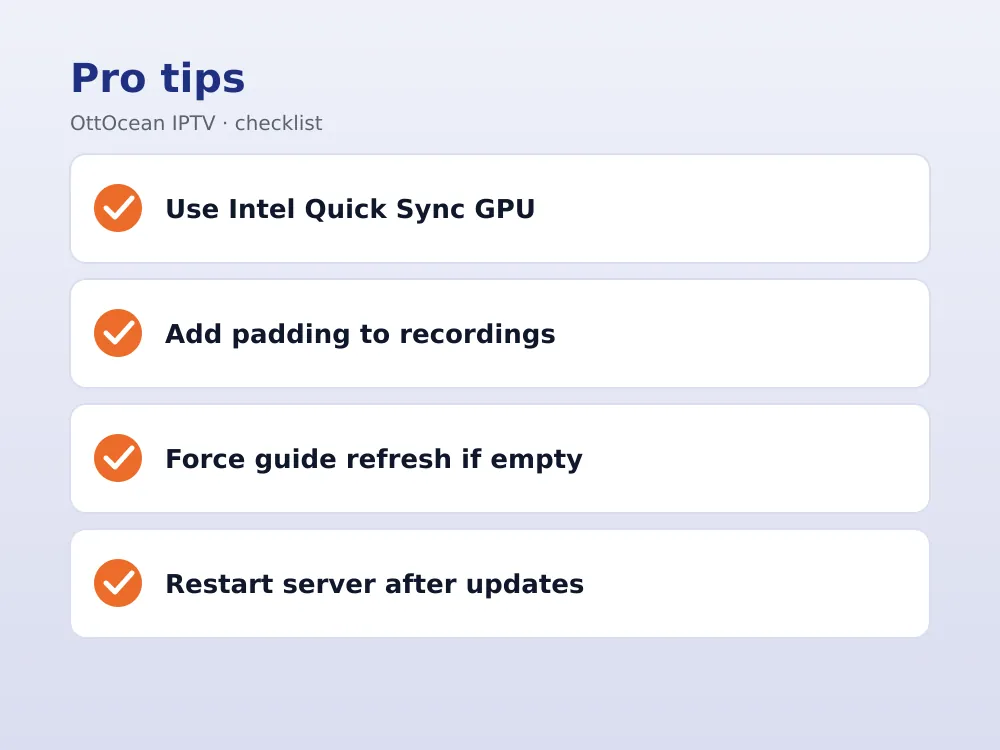
Guide refresh happens on a schedule Jellyfin manages automatically, but you can force an immediate update from the same settings page after making changes rather than waiting for the next scheduled sync, which is useful right after switching providers or fixing a broken link.
Hardware Transcoding for Smooth Playback
Jellyfin can transcode streams on the fly for devices that can’t play the incoming format natively, but doing this on CPU alone strains modest hardware fast, especially with multiple simultaneous viewers. Hardware transcoding, using your server’s GPU instead, is the fix.
Intel Quick Sync, supported on most recent Intel CPUs with integrated graphics, is the most common hardware transcoding path for a home Jellyfin server, and it’s free to enable under Dashboard > Playback once appropriate drivers are installed on the host operating system.
Without hardware transcoding, a lower-power server can still work fine for direct-play scenarios, meaning the client device plays the stream in its original format without conversion, which is common when your device already supports the incoming codec.
AMD and Nvidia GPUs work too, through their respective hardware encoding paths, though driver setup on Linux can be more involved than Intel’s integrated option. Check Jellyfin’s own documentation for your specific GPU model before assuming a particular acceleration method will work out of the box.
Jellyfin DVR and Recording IPTV Channels
Unlike Plex, which gates DVR recording behind a Plex Pass subscription, Jellyfin includes scheduled and series recording as a core free feature. Once your tuner and guide data are set up, a record icon appears next to programs in the guide, and recurring series recordings can be scheduled from the same screen.
Recordings save to a folder you configure on the server’s storage, so plan for enough free space if you plan to record live sports or full movies regularly; an hour of 1080p can run roughly 1.5-3GB depending on the source bitrate and your transcoding settings.
Recording reliability depends on accurate timing data the same way it does on Plex, so a small padding buffer before and after scheduled recordings is worth setting if your provider’s broadcasts tend to run past their listed end time, especially for live sports coverage.
Series recording rules can also be set to only grab new episodes rather than every rerun in a lineup, which keeps your storage drive from filling up with duplicate content over a busy sports or news season. Review your recording rules periodically to prune anything you’re no longer actually watching.
Jellyfin Client Apps: Android TV, Fire TV, iOS, and Web
Jellyfin’s official apps cover most devices a household actually uses. Android TV and Fire TV both have dedicated apps in their respective app stores, with Fire TV sometimes requiring a manual sideload through Downloader if it isn’t listed for your specific Fire TV model.
iOS and Android phone apps work well for on-the-go viewing, and Jellyfin’s web client runs directly in a browser on any computer, no installation required. Apple TV support exists but has historically lagged behind Android in feature completeness.
Smart TV support varies by brand; some Samsung and LG models run a native or web-based Jellyfin client, while others need an external streaming device like a Fire TV Stick or Android TV box to access Live TV at all.
Roku doesn’t have an official Jellyfin app as of 2026, so Roku owners typically cast from a phone or use a screen-mirroring workaround rather than a dedicated client. If Roku is your primary device, factor that limitation in before building your whole setup around Jellyfin.
Browser-based access on the web client works identically across Windows, Mac, and Linux, which makes it a reliable fallback for any device with a modern browser even when a dedicated app isn’t available or hasn’t been installed yet on a shared family computer.
Tablet apps for both iPad and Android tablets share most of the same interface as their phone counterparts, just with a layout better suited to a larger screen, which makes casual live-TV browsing from the couch comfortable without needing a full TV setup nearby at all.
Desktop apps also exist for Windows and Mac beyond the browser client, offering a slightly more native feel with system-level notifications and a dedicated icon in the taskbar or dock for quick access.
Using Threadfin to Filter Channels Before Jellyfin
Jellyfin’s native M3U support means you don’t strictly need Threadfin or xTeVe the way Plex users do, but they’re still useful for pre-filtering a huge channel bundle down to your actual favorites before it ever reaches Jellyfin’s tuner settings.
Running your playlist through Threadfin first also lets you clean up channel names, group categories more sensibly, and merge guide sources if your provider’s XMLTV feed is split across multiple files. This step is optional but worth it for very large bundles with thousands of entries.
For most single-provider households with a reasonably sized channel list, adding the playlist straight to Jellyfin without any intermediate tool is simpler and perfectly reliable. Save the extra filtering step for cases where you’re genuinely overwhelmed by an oversized channel lineup you’ll never fully browse.
If you do add Threadfin into the chain, remember that it becomes another piece of software to keep running and updated. Weigh that ongoing maintenance cost against how much time a cleaner channel list actually saves you day to day before committing to the extra layer.
Jellyfin vs Plex for IPTV: Which to Choose
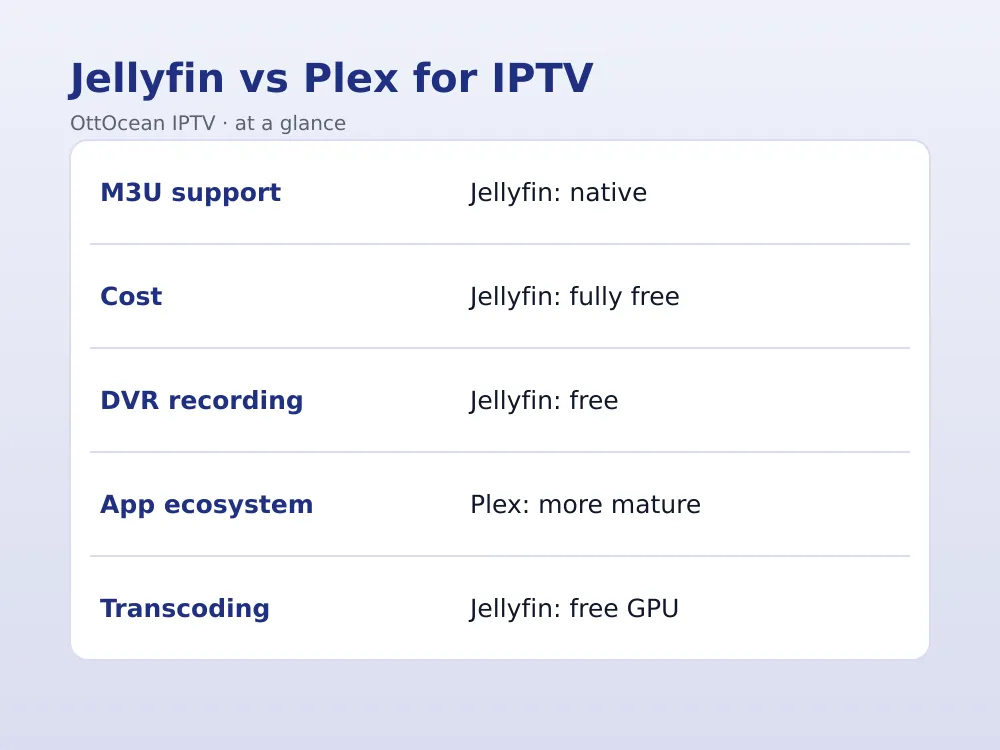
| Factor | Jellyfin | Plex |
|---|---|---|
| M3U tuner support | Native, built-in | Needs xTeVe/Threadfin |
| Cost | Free, no paid tier | Free live TV, Plex Pass for DVR |
| Client app polish | Good, improving | More mature ecosystem |
| Hardware transcoding | Free to configure | Some features need Plex Pass |
If cost and native support matter most, IPTV on Jellyfin is the simpler, cheaper path. If you value a more polished app ecosystem and don’t mind Plex Pass for DVR, Plex remains a strong alternative worth considering too.
Households already invested in a large Plex library of movies and shows sometimes stick with Plex purely for continuity, adding IPTV as a secondary feature rather than switching platforms entirely. There’s no wrong answer here; both handle live channels competently once configured.
New households starting from scratch, with no existing library to migrate, generally find Jellyfin the lower-friction choice, since there’s no account creation, no tier comparison, and no upsell screen to click past before you reach the actual Live TV settings you actually came here for.
Fixing Common IPTV on Jellyfin Errors
Most support questions about IPTV on Jellyfin trace back to one of these issues.
- No channels appear after adding the tuner: re-check the M3U URL for typos and confirm your subscription is active
- Guide shows no program data: revisit the TV Guide Data Provider entry and confirm the XMLTV URL saved correctly
- Streams buffer constantly: check whether hardware transcoding is enabled and correctly configured for your GPU
- Client app can’t find the server: confirm the app and server are on the same network, or set up remote access under Dashboard > Networking
- Recordings cut off early: add a small padding buffer to your recording schedule to account for broadcasts running past their listed end time
A full server restart resolves a surprising number of lingering Live TV glitches, particularly after a Jellyfin version update. It’s worth trying before digging deeper into log files if something that worked yesterday suddenly stops working today.
Jellyfin’s dashboard also includes a scheduled tasks log under Dashboard > Scheduled Tasks, which shows exactly when the last guide refresh ran and whether it completed successfully. Checking this log before assuming something is broken often saves a support request entirely and points you straight at the real cause.
Key takeaways
- IPTV on Jellyfin supports M3U tuners natively, unlike Plex which needs a separate emulator
- Jellyfin is entirely free with no paid tier required for live TV or hardware transcoding
- XMLTV guide data must be added separately as a TV Guide Data Provider under Live TV settings
- Intel Quick Sync is the most common free hardware transcoding path for a home server
- Threadfin remains useful for pre-filtering huge channel bundles even though it isn’t required
- Client apps cover Android TV, Fire TV, iOS, and web browsers, with smart TV support varying by brand
- Most setup failures trace back to a mistyped playlist or guide URL, not a server problem
FAQ: IPTV on Jellyfin
Do I need Threadfin or xTeVe for IPTV on Jellyfin?
No, not for basic setups. Jellyfin supports adding an M3U playlist directly as a tuner device, unlike Plex. Threadfin remains useful for filtering a large channel bundle down to your favorites or cleaning up messy channel names, but it’s an optional extra step, not a requirement.
Is Jellyfin really free for live TV?
Yes. Jellyfin has no paid tier at all; every feature, including Live TV, DVR recording, and hardware transcoding, is free and open-source. This is the main practical advantage over Plex, which reserves DVR recording for Plex Pass subscribers.
Why does my Jellyfin guide show no program data?
This usually means the XMLTV guide link wasn’t saved correctly, or it isn’t matched to the correct tuner. Check Dashboard > Live TV > TV Guide Data Providers, confirm the URL, and force a guide refresh from the same settings page.
Is IPTV on Jellyfin legal?
Jellyfin itself is free, open-source software with no built-in content, and it’s entirely legal to run. Legality depends on the IPTV service whose playlist you add. Streaming through a properly licensed subscription is standard practice, and users are responsible for the content they access.
Does Jellyfin support 4K IPTV streaming?
Yes, provided your server hardware can handle it, either through direct play or hardware transcoding. A connection of 40 Mbps or higher is recommended for reliable 4K playback, along with a CPU or GPU capable of decoding high-bitrate streams without dropped frames.
Can I run Jellyfin and Plex at the same time?
Technically yes, since they’re separate applications, but running both simultaneously for the same IPTV playlist is redundant for most households. Pick one based on whether native M3U support or a more mature client app ecosystem matters more to your setup.
Ready to Try IPTV on Jellyfin Today?
Jellyfin’s native M3U support makes setup quick, but you still need a reliable playlist behind it. OttOcean offers a 5-day free trial, no credit card required, so you can confirm your M3U and XMLTV links work correctly with Jellyfin before subscribing.
Once confirmed, our subscription plans start at $9.99 for one device, with multi-device options if Jellyfin is serving more than one TV in your home. For more setup detail, see our M3U playlist setup guide and EPG setup guide. Official Jellyfin Live TV documentation is available on the Jellyfin project site.