Last updated: September 17, 2026
A good HDMI IPTV encoder is the box that takes whatever plays over an HDMI cable — a cable box, a camera, a PC, a Blu-ray deck — and turns it into a network video stream your IPTV middleware or media server can distribute. Get the wrong one and you will spend weeks fighting HDCP errors, dropped frames, and audio sync drift. Get the right one and the source just works, at whatever bitrate you set.
On this page
- What Is an HDMI IPTV Encoder and How Does It Work?
- HDMI Capture, HDCP, and Latency: What to Check First
- How Many HDMI Inputs Do You Actually Need?
- Choosing Output Protocols: RTMP, HLS, SRT, and UDP
- 8 Best HDMI IPTV Encoders to Buy in 2026
- HDMI IPTV Encoder vs. Software Encoding: Which Should You Use?
- Step-by-Step: Setting Up Your HDMI IPTV Encoder
- Pairing Your Encoder with VLC, OBS, Wowza, or Flussonic
- Common HDMI IPTV Encoder Problems and Fixes
- Key takeaways
- FAQ: HDMI IPTV Encoder
- Conclusion

What Is an HDMI IPTV Encoder and How Does It Work?
An HDMI IPTV encoder sits between an HDMI source and your network. Inside, a chip — or software running on general-purpose silicon — grabs the raw HDMI signal, compresses the video with H.264 or H.265, compresses the audio with AAC, and wraps both into a network-friendly container.
That container leaves the box as one of a handful of output formats — RTMP for pushing to a server, HLS for pulling by players, SRT or UDP for low-latency point-to-point links. Your IPTV middleware, an origin server like Flussonic or Wowza, or even a simple VLC instance picks up that stream and redistributes it to viewers.
The whole chain matters. A weak encoder chip only pushes 1080p at high bitrates before dropping frames; a good one handles 4K60 at a fraction of the bitrate thanks to modern H.265 encoding. Two “encoders” that look identical on a spec sheet can behave very differently once real content hits them. For a deeper breakdown of hardware options across budgets, see our guide to the best IPTV encoders.
HDMI Capture, HDCP, and Latency: What to Check First
Before you shop, understand the three things that trip people up. First, resolution and frame rate — most budget encoders handle 1080p60 fine, but 4K60 capture needs a chip built for it, so check the datasheet rather than the marketing page.
Second, HDCP. Many consumer HDMI sources — cable boxes, streaming boxes, Blu-ray players — encrypt their output with HDCP 1.4 or 2.2 specifically to stop this kind of capture. A protected source shows a black screen or an error on a standard encoder. Only capture content you own or are licensed to redistribute; see Wikipedia’s HDCP overview for how the protection actually works.
Third, latency. Encoding always adds delay, typically 200 milliseconds to 2 seconds depending on the codec, the encoder’s buffer settings, and the output protocol. Relaying live sports where viewers compare notes with neighbors watching cable calls for low-latency settings — SRT output and a smaller GOP size matter more here than for, say, a hotel information channel.
How Many HDMI Inputs Do You Actually Need?
Encoders come in 1-channel, 4-channel, and 8-channel (occasionally 16-channel) chassis. A solo content creator or a small church needs one input. A hotel with several cable feeds, a campus TV system, or an IPTV reseller building a small headend usually wants 4 or 8 channels in one rackmount unit — cheaper per channel and easier to manage than a pile of single-port boxes.
- 1-channel: streamers, home labs, single-camera setups, roughly $120–$300.
- 4-channel: small hotels, gyms, campus TV, roughly $500–$1,200.
- 8-channel: resellers, larger hotels, regional headends, roughly $1,200–$3,000.
More channels also means more configuration per unit — each HDMI input gets its own bitrate, resolution, and output URL, so budget setup time accordingly, especially the first time you touch a new brand’s panel.
Choosing Output Protocols: RTMP, HLS, SRT, and UDP
Every HDMI IPTV encoder gives you a choice of output protocol, and picking the right one saves headaches later.
- RTMP: the old reliable. Push straight to Wowza, Flussonic, YouTube, or an Xtream Codes-style panel. Simple to set up, widely supported.
- HLS: the encoder, or a downstream packager, slices video into small segments players pull over HTTP. Great for scale, adds a few seconds of latency.
- SRT: built for unreliable networks. It retransmits lost packets and keeps latency low — the right pick for contribution links over the open internet.
- UDP/multicast: the classic choice for a closed LAN, like a hotel’s internal TV distribution, where you are not routing over the public internet.
Most serious HDMI IPTV encoders support at least three of these simultaneously, so you are rarely locked into one path once your setup grows. A multi-channel HDMI encoder often mixes protocols per channel — RTMP for the main feed and SRT for a backup link, for example — so plan your firewall rules for more than one type of outbound traffic.
8 Best HDMI IPTV Encoders to Buy in 2026
We compared specs, real-world reviews, and community reports across the current crop of HDMI capture encoders. Here is how the field breaks down by use case and budget, from single-channel starter units to rackmount headend gear. Whichever multi-channel HDMI encoder or single-port unit you land on, confirm firmware update history and community support before buying — abandoned hardware is the fastest way to end up stuck.
1. URayCoder 4-Channel HDMI Encoder
A dependable mid-range workhorse. Four HDMI inputs, H.264/H.265 encoding, RTMP/HLS/UDP/SRT output, and a web-based config panel that needs no special software. Popular with small resellers building their first multi-channel setup.
2. LinkPi ENC1
Single-channel, compact, and inexpensive. H.265 support keeps bitrate low without sacrificing picture quality — a favorite for solo streamers who need one clean HDMI-to-RTMP path and nothing more complicated.
3. Orivision 8-Channel Rackmount Encoder
The step-up option for larger jobs — eight independent HDMI inputs in a 1U rack chassis, each with its own bitrate and protocol settings. Built for hotels and campus deployments where density matters most.
4. FMUSER HDMI to IP Encoder
A budget single-channel option that punches above its price. Basic web interface, solid H.264 encoding, RTMP and UDP output. A good starter unit before committing to an 8-channel chassis.
5. Zowietek ZWES2 Series
Known for stable long-run uptime — these units show up often in 24/7 broadcast setups because they rarely need a reboot. H.265 support and a reasonably fast web UI round out the package.
6. Kiloview E2 (Budget Line)
Kiloview’s entry unit trades some of the flagship’s bitrate ceiling for a lower price, but keeps the reliable NDI-friendly ecosystem and simple mobile-app management that make the brand popular with AV integrators.
7. Blackmagic Web Presenter (Stretch Pick)
Not a pure encoder — it is a hardware switcher built for webcam-style output — but paired with OBS or a small PC it becomes a clean HDMI-to-stream path. Pricier, and it needs a computer downstream, but video quality is excellent.
8. TBS2603 Multi-Channel Encoder
A professional-grade option seen in small cable headends and IPTV resellers’ racks. Supports simultaneous multi-protocol output per channel and holds up well under 24/7 load, year after year.
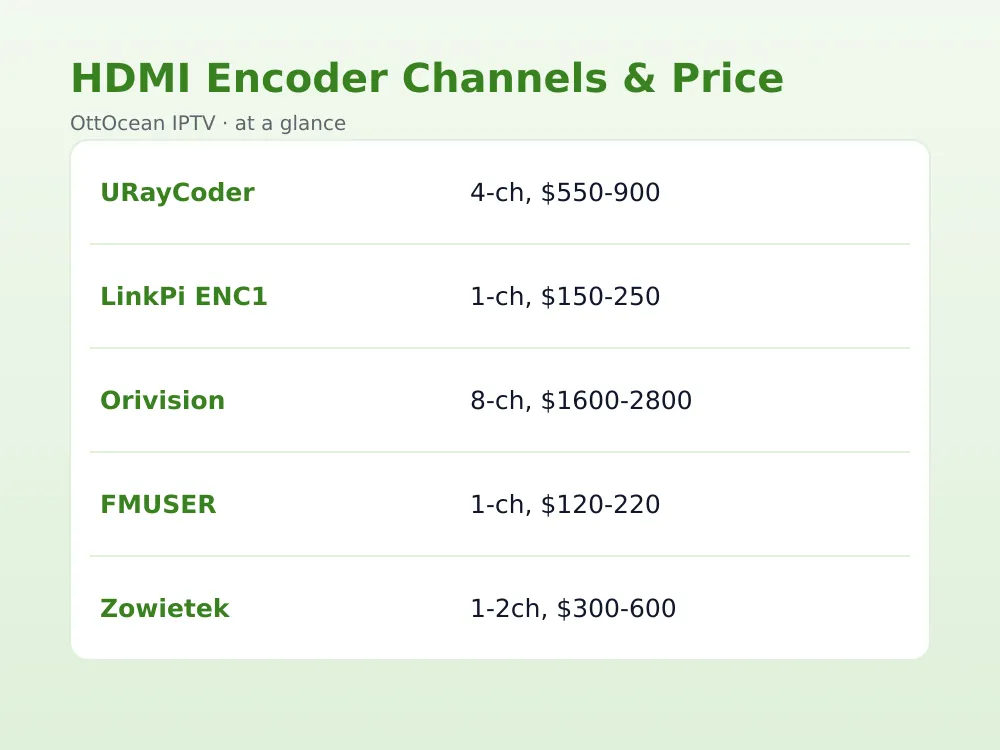
| Model | Channels | Codec | Output | Approx. Price |
|---|---|---|---|---|
| URayCoder 4-Ch | 4 | H.264/H.265 | RTMP/HLS/SRT/UDP | $550–$900 |
| LinkPi ENC1 | 1 | H.265 | RTMP/UDP | $150–$250 |
| Orivision 8-Ch | 8 | H.264/H.265 | RTMP/HLS/SRT/UDP | $1,600–$2,800 |
| FMUSER HDMI-IP | 1 | H.264 | RTMP/UDP | $120–$220 |
| Zowietek ZWES2 | 1–2 | H.264/H.265 | RTMP/HLS/UDP | $300–$600 |
HDMI IPTV Encoder vs. Software Encoding: Which Should You Use?
A dedicated HDMI IPTV encoder is not the only way to turn an HDMI source into a stream. Software running on a PC — OBS Studio, FFmpeg, or vMix — can do the same job if you already own the hardware and do not mind managing a computer alongside it.
The trade-off is reliability and hands-off operation. A hardware HDMI to IP converter runs standalone, boots in seconds, and keeps working through a power blip without anyone touching a keyboard. A software rig needs an OS, driver updates, and someone available if the machine decides to reboot for patches at 3 a.m. — not a problem a dedicated HDMI video encoder ever has.
Cost tips the other way at small scale. A capable capture card plus a mid-range PC can undercut a dedicated multi-channel HDMI encoder on day one, especially if spare hardware is already sitting around the office. That math flips fast once you need more than two or three simultaneous channels — stacking capture cards and a beefier CPU quickly approaches, or exceeds, the price of a purpose-built 4- or 8-channel unit.
Our rule of thumb: pick software encoding for occasional, single-source jobs where a capable PC already exists. Pick a dedicated HDMI video encoder for anything that needs to run unattended 24/7 — hotels, resellers, and multi-channel headends all fall firmly into that second category, where an idle laptop is not an acceptable failure point.
Step-by-Step: Setting Up Your HDMI IPTV Encoder
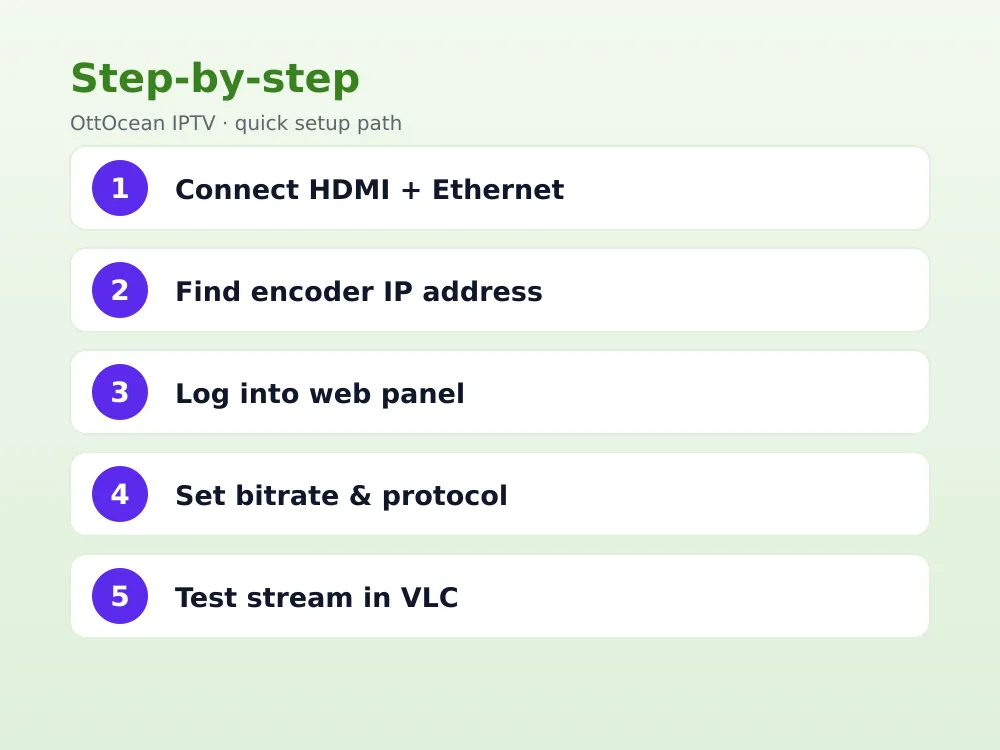
Setup varies slightly by brand, but the flow is nearly identical across every HDMI IPTV encoder on the market. Here is the general sequence we use when unboxing a new unit. For the bigger picture of how every piece fits together, our how IPTV works guide covers the full chain from encoder to viewer.
- Connect the HDMI source to the encoder’s input, and an Ethernet cable from the encoder to your network switch or router.
- Find the encoder’s IP address — check your router’s client list, or use the vendor’s discovery app.
- Log into the web configuration panel with the default credentials listed in the manual.
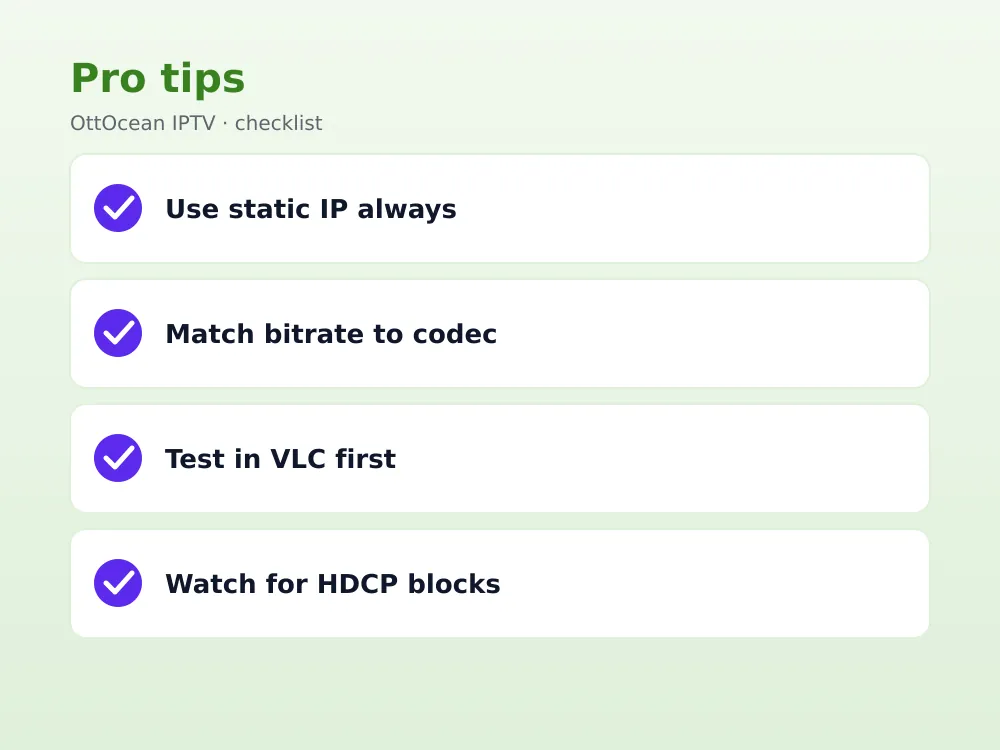
- Set resolution, frame rate, and bitrate for each channel; start at 1080p, 4–6 Mbps for H.264 or 2–3 Mbps for H.265.
- Choose your output protocol — RTMP push to your server, or HLS/UDP for pull — and enter the destination URL.
- Save, then test the stream in VLC by opening the network URL before wiring it into your middleware.
Once the test stream plays cleanly in VLC for a few minutes with no buffering, you are ready to point it at your actual IPTV panel or CDN origin server.
Pairing Your Encoder with VLC, OBS, Wowza, or Flussonic
VLC is the fastest sanity check. Open Media, then Open Network Stream, paste the RTMP or UDP URL, and you will know within seconds whether the encoder is producing a valid signal.
OBS Studio can ingest an SRT or RTMP feed from your encoder as a source, which is handy if you want to overlay graphics or mix the HDMI feed with other scenes before re-streaming it further downstream.
For production-scale distribution, most resellers push the encoder’s RTMP or SRT output into Flussonic or Wowza, which then transcode to multiple bitrates and repackage as HLS for apps like IPTV Smarters or TiviMate. That is also where the stream gets plugged into an M3U playlist for distribution to end users.
Common HDMI IPTV Encoder Problems and Fixes
Most HDMI IPTV encoder headaches trace back to one of four causes, and all four are fixable without buying new hardware.
- Black screen or HDCP error: your source is HDCP-protected. Use an HDCP-compliant source, and only strip protection where you legally own the content.
- Audio out of sync: almost always a buffer mismatch — increase the audio delay setting in small increments until it lines up cleanly.
- Choppy video at 4K: your Ethernet link or switch cannot keep up. Confirm gigabit end-to-end and check for a saturated uplink port.
- Stream drops randomly: often a DHCP lease issue — assign the encoder a static IP so it never gets bumped mid-broadcast.
Firmware matters too. Most reputable HDMI IPTV encoder brands ship regular firmware updates that fix exactly these four issues, plus add new codec support over time. Check the manufacturer’s site every few months, back up your channel configuration first, and update during a maintenance window rather than live air.
Key takeaways
- An HDMI IPTV encoder converts an HDMI source into RTMP, HLS, SRT, or UDP for network distribution.
- Match channel count to the job: 1-channel for solo streaming, 4- or 8-channel for hotels, resellers, and headends.
- H.265 encoding cuts bitrate roughly in half versus H.264 at the same visible quality.
- HDCP blocks capture of protected sources — only relay content you own or are licensed to redistribute.
- Test every new encoder in VLC before wiring it into your middleware or CDN origin.
- Static IPs prevent the random stream drops that plague DHCP-assigned encoders.
- Budget $150–$300 for one channel, $500–$3,000 for multi-channel rackmount units.
FAQ: HDMI IPTV Encoder
What is the difference between an HDMI IPTV encoder and a capture card?
A capture card feeds a connected computer, which then runs its own encoding software. An HDMI IPTV encoder does the encoding itself, on dedicated hardware, and outputs a ready-to-stream signal directly to the network, no PC required. That makes it more reliable for 24/7 unattended operation, though a capture card plus a capable PC can be cheaper for occasional use. If you already run a home lab full of spare PCs, software encoding remains a fine choice for a single HDMI video encoder job; just budget the extra admin time.
Can an HDMI IPTV encoder capture from a cable box?
Physically, yes, but most cable boxes output HDCP-protected HDMI, which a standard encoder cannot capture — you will see a black screen or an HDCP error. Legally, you also need the right to redistribute that content, which most cable subscriptions do not grant. For legitimate multi-room or hotel distribution, ask your provider about licensed distribution equipment instead.
How much bitrate does an HDMI IPTV encoder need for 1080p?
For H.264, 4–6 Mbps gives a clean 1080p60 picture for most content; H.265 achieves similar quality at roughly half that, around 2–3 Mbps. Fast-motion content like sports benefits from the higher end of that range, while static content like an information channel can run lower without a visible quality drop.
Do I need a separate encoder for each HDMI source?
Not if you buy a multi-channel unit — 4- and 8-channel HDMI IPTV encoders handle several independent sources in one chassis, each with its own settings and output URL. Single-channel encoders are cheaper individually but add up fast once you need more than two or three sources running at once.
What is the typical latency of an HDMI IPTV encoder?
Expect 200 milliseconds to roughly 2 seconds end-to-end, depending on codec, GOP size, and output protocol. SRT and UDP with a small buffer deliver the lowest latency; HLS trades a few extra seconds of delay for smoother playback across many simultaneous viewers.
Can I use an HDMI IPTV encoder to add channels to my IPTV subscription?
No — an encoder captures and streams a source you control; it does not add channels to a subscription service. If you want more live channels, movies, or VOD, that comes from your provider’s channel list, like the 25,000+ channel lineup included with an OttOcean subscription plan.
Conclusion
The right HDMI IPTV encoder comes down to matching channel count and codec support to your actual job — one clean channel for a streamer, four to eight for a hotel or reseller headend. Get the bitrate and protocol settings right, test in VLC first, and the rest of the chain falls into place quickly. Whether you land on a single HDMI to IP converter or an 8-channel rackmount unit, matching channel count to real demand keeps costs sane.
If you are building distribution around IPTV content rather than encoding your own source, skip the hardware shopping entirely: OttOcean’s 5-day free trial gets you 25,000+ live channels with no credit card required, and plans start at $9.99 a month if you decide to stick around.